
This fall, in addition to teaching bookmaking and letterpress at my home school of California College of the Arts, I've been teaching the Introduction to Bookmaking class at California State University, East Bay, usually taught by Michael Henninger. We visited the Special Collections department in the library there and looked at books I picked out that were both familiar and unfamiliar to me. One 2005 book, (I Want a) Prenup by Petra Press, utilized a structure I had not seen before: two eight-panel accordions that interlocked, much like Slot & Tab (in Making Handmade Books). The design of the pages makes excellent use of the mix-and-match effect of the structure. Petra Press, on the Vamp and Tramp website, describes it as a "double accordion book." The playfully woven designs on the page clearly took quite a bit of time, thought, and careful planning.


The interlocking double accordion structure turns out to be simple, yet eye-catching. No sewing. No gluing. It invites multiple approaches, colors, texts, and designs. It only takes a few minutes to assemble.
Materials: 2 strips of medium weight paper, such as Canson Mi-Teintes or Strathmore ArtAgain. The following example uses Strathmore Drawing 400, 24" wide and 4.5" high, grained short. (The model above Prenup utilizes two different colors of Strathmore ArtAgain, which shows the structure more clearly.)
Tools: pencil, eraser, bone folder, X-Acto knife and cutting mat, metal ruler

1. Fold each strip into an eight-panel accordion by folding in half; folding the edges in to the center like a cupboard; folding the edges back out like window shutters; flipping the book over like a table; fold in to the center to create the fan folds.

2. Close one accordion fan, face the open edge right. Measure and mark halfway down the left folded edge.
3. Measure and mark 1" on either side of the first mark.

4. Starting at the center mark, measure and mark 1.5" from the folded edge toward the right. (This could be longer.)

5. With the knife against the ruler, cut from the new mark to one of the top or bottom marks along the folded edge. Repeat for the second mark.


6. Use the opening as a guide to make two marks on the second accordion, also along the folded side, open edge to the right.

7. This time, cut from the mark to just below the opposite corner. Top mark to head, bottom mark to tail.

8. Arrange the accordions side by side, wedged-shaped on the left, open triangle on the right. Open edges to the right.
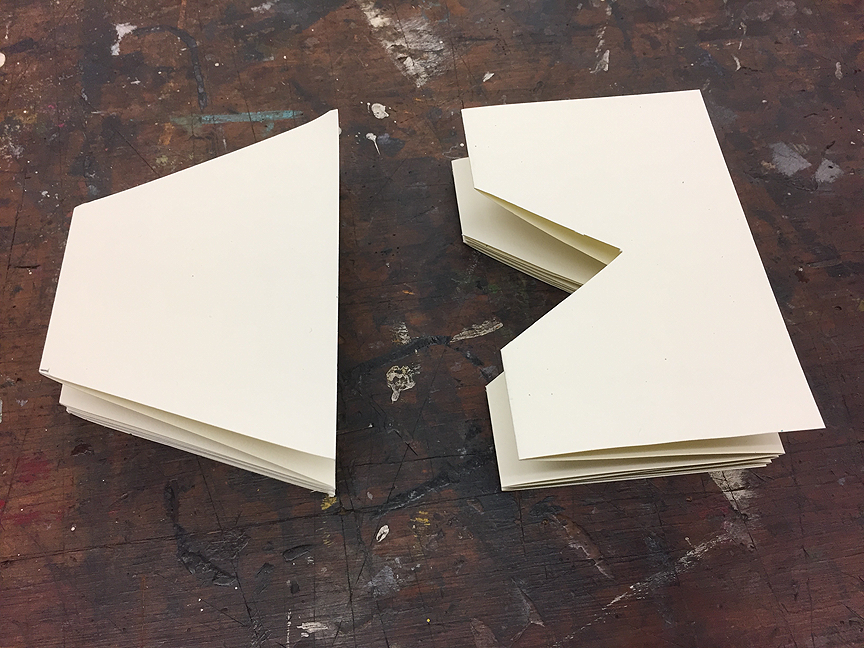
9. Take the first mountain from the wedge-shaped accordion and bend the points slightly so that they will fit through the slot in the triangle-shaped accordion. Pull it through. (Note: you may be able to rotate the accordion so it is perpendicular when you pull it through the diamond-shaped opening to minimize the bending needed.)


10. Repeat for each set of mountain folds. The last will be a single page through the slot.

It works well with two colors of paper. I particularly like how, in this one, it looks like the beam of a flashlight moving as the page turns.


I'm looking forward to working with this one, possibly doing some printing over the December-January break.
Comments